|
Double Neck Project "Not For The Feint of Heart!!" |
|
|
|
|
|
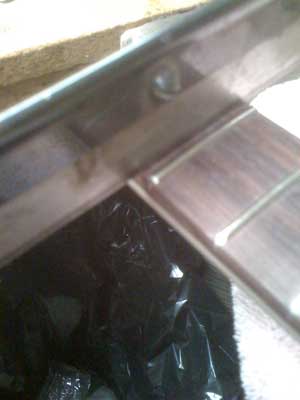
Take This: |
Remove this: |
Becomes Double neck Mandolin /
Guitar!!! |
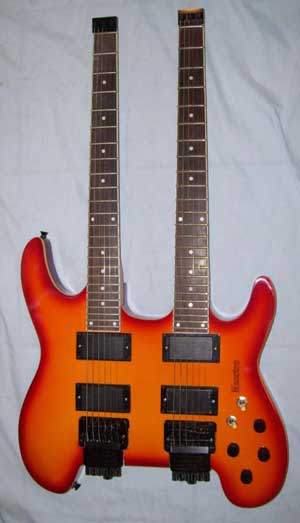 |
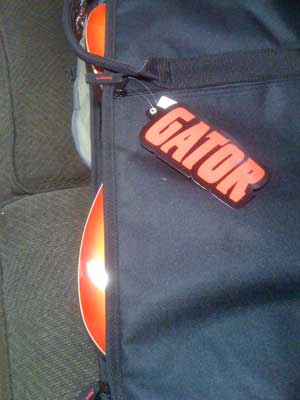
The model on the left was purchased off ebay for $250 - $300
If taking $300 to the band saw and cutting it up gives you shivers,
read no further!!
I apologize in advance for the grainy, slightly fuzy photos. These
were all taken with my phone. I lost my tri-corder readings though!
(some of you will get that) |
 |
|
If you want to build one of these yourself. I am making a kit
available. It includes a Slotted (14.375" my favorite) and radiused
(12"R) fretboard 1/8" bone nut blank (you will need to final
shape and cut string slots. 4' of guitar fretwire. |
|
|
 |
So, I have been playing more guitar and electric mandolin the last 4
or 5 years. I am always switching back and forth. I have been thinking
of a Double Neck for some time. But don't have the time or interest to
build from scratch right now. So my original thought was to take a
pre-built dbl-neck and modify it. When I saw this headless model (upper
left) I was thinking I could modify one neck to mandolin and so this is
a collection of photos of that journey. (left and right) Remove
the necks, choose the bad one to modify.
*It would be
best if you leave the lower neck where it is and modify the upper neck
as the mounts are not exactly the same. The upper neck on mine was the
better of the two but when I mounted it in the lower pocket it didn't
line up as well.*
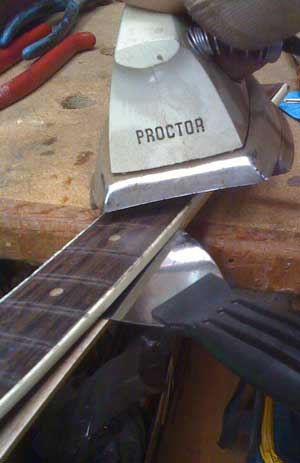
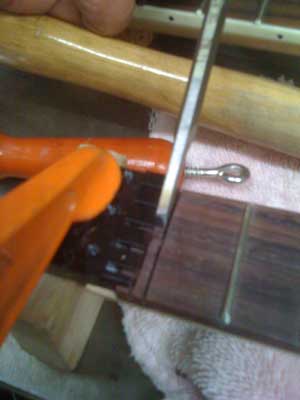
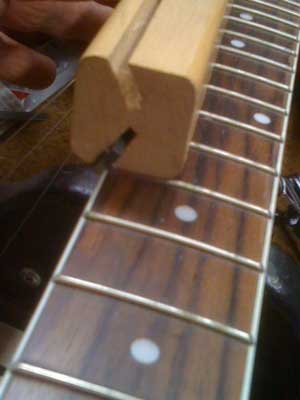
Remove the frets with end
nippers ground flat. Remove the fingerboard with heat putty knives. I
used an iron for heat. **tip, get your own iron. Do not! I repeat, Do
Not use your wife's iron for this!! Go slow and let the heat do the
work.
Remove the truss rod. You probably should throw this in the trash but
if you are like me. Well, I won't say anymore. The fingerboard should go
to the trash even if you have the skills to get it off in one piece!
|
 |
 |
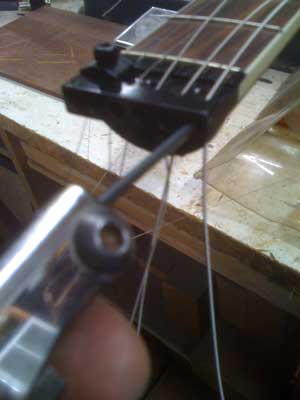
Truss rod removed, necks removed and the back opened up to get
to the wires. The wire from the ground and the pickups will need to be
cut and pulled through the body cavity before cutting on the bandsaw.
Left, if you are handy with welding it would be
easy to modify the original truss rod. Just cut it to length and weld
the end using the original as a pattern.
You could also just epoxy in a solid steel bar or graphite.
Because of the light gauge strings and the thickness of the neck you
probably could just inlay a piece of hardwood and it it would be fine
(but I can't guarantee that) I have had mine up and running for about
three weeks now and I still have not tightened the truss rod. But that
is just my experience with one of these instruments. Your mileage may
vary!
|
 |
 |
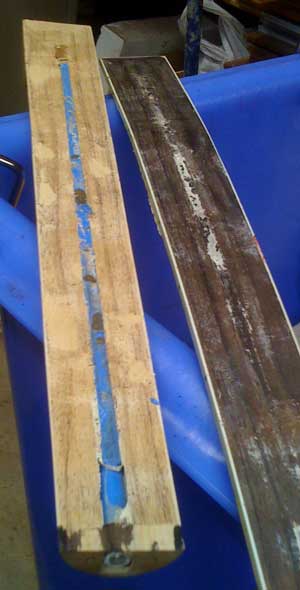
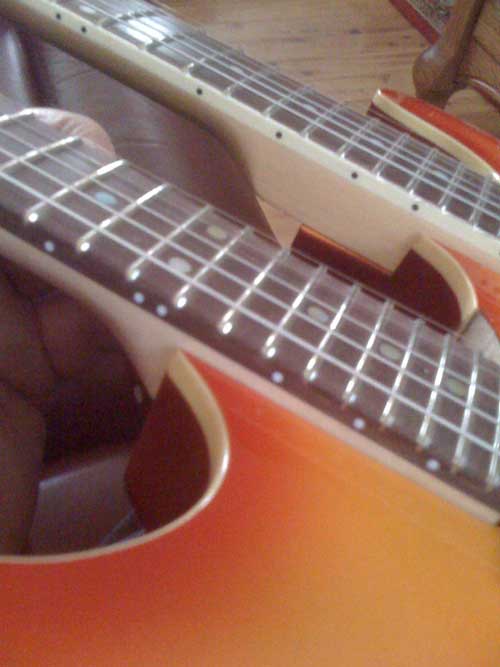
I kind of designed this as I went. But I was going from a 25.500"
scale down to a 14.375" scale and that means moving lots of stuff
around! I have a small collection of instruments, some that I built and
some from other builders. One of my favorite electric mandolins is a
Schwab 5 string. It took a while to get used to the scale. I had always
heard it was a 14.500" But the one I have is actually 14.375" so
that is the scale I used for this project. I had to shorten the but
end of the neck blank by about an inch.
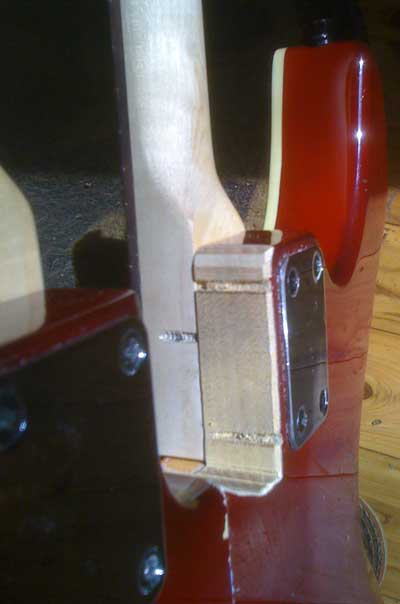
I did use a mandolin size truss rod. I am not totally convinced it
was needed. Since I strung it up the truss rod was not tightened or
loosened. I would think an inlay of graphite would be plenty good
as well, but I new I would have an existing channel to work with. The
new truss rod was taller that my channel was deep, so I elected to cut
about 1/16" one the bottom of the fretboard and leave the neck alone.
I added a little more information regarding this in the section above
but if you are here you probably already read it, if not you may want to
read that as well if you are planning to massacre one of these yourself!
The idea was to remove material from one side of the neck and remove
one string. Leaving the pickups and saddles positioned as they were. |
 |
 |
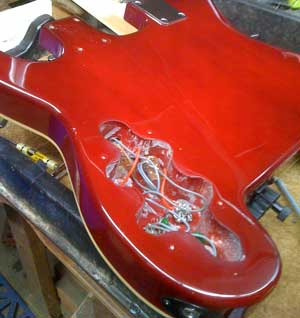
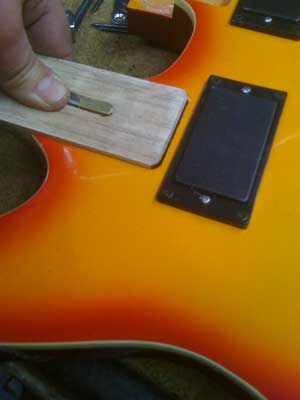
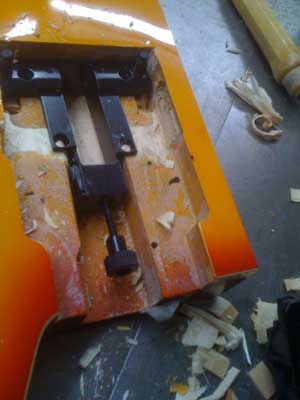
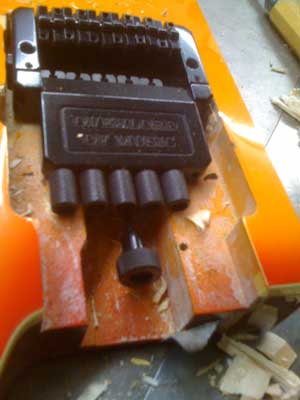
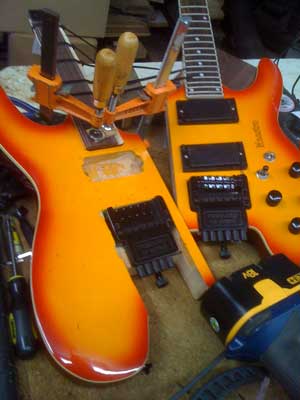
(left) the lower pickup needed to come out as this is where
the bridge would be moving to. Also the tailpiece was removed and the
ground wire to the tailpiece was pulled back inside the body cavity.
(right the tailpiece is sitting over its new location. I sat the new
slotted board in place and measured approximately 14.375" to get the new
location of the tailpiece. (moving saddles are a nice feature) I haven't
worked with hardware like this before. It is heavy! most of the weight
on this instrument is from these tailpieces. And it is heavy!!
|
 |
 |
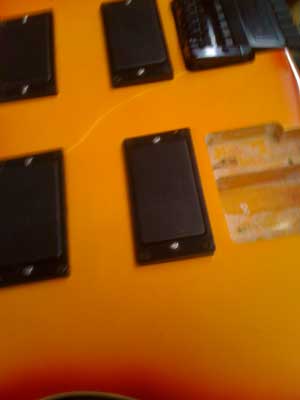
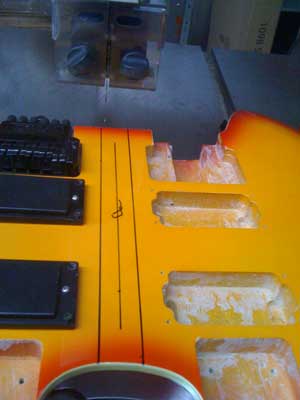
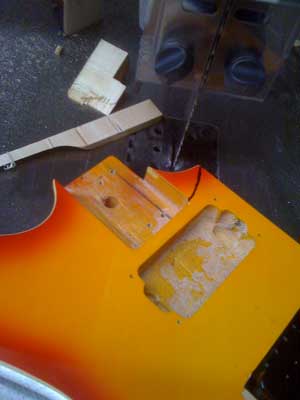
I thought I would cut some weight down by taking some material out
of the center and also get the necks a little closer together. The
reality is that the body is made of alder and therefore very light. (the
weight was from the hardware!) but I still wanted the necks closer and
the original guitar wouldn't fit the new case I bought for it! (always
buy the case first!) Builders will understand! I removed the pickups
and wires running through the body and took it over to the bandsaw. |
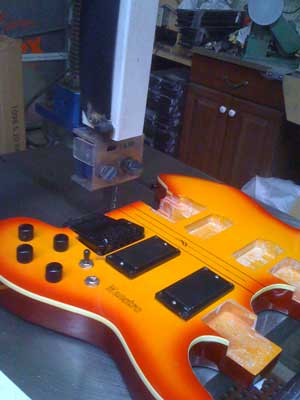 |
 |
There is something really delightful about taking a new instrument
and laying on the bandsaw table. Right as the motor starts up (6 hp in
this case) the biggest smile you ever saw cam across my face!!
I was still enjoying myself at the joiner!! |
 |
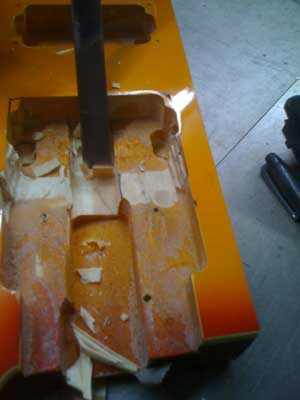 |
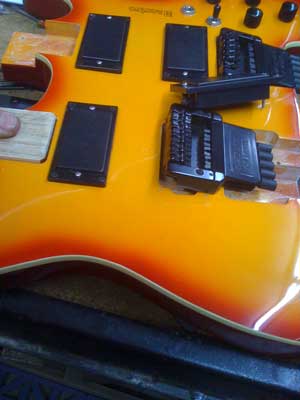
OK, enough of that! you can see that the wood was removed into where
the pickup cavity was, also the lower mortise needs to be moved. You can
use a router for this but be careful if you do. This alder body responds
well to a hammer and chisel! (which is what I wound up using. A wise man
said that "if you see your problem as a nail, the solution is always a
hammer!!" OK, you can see I have the lower receiver in its new
location (on right) |
 |
 |
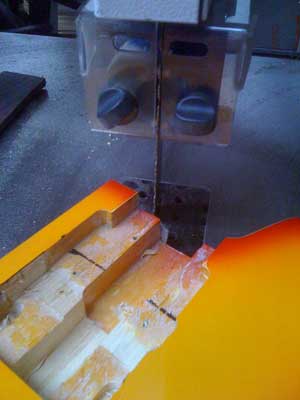
With the tailpiece in its new location we need to cut the body
again. Oh boy! Oh boy! to the bandsaw!! |
 |
 |
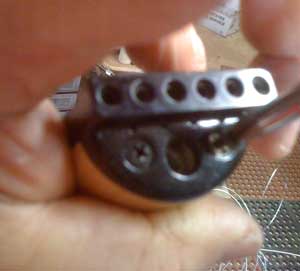
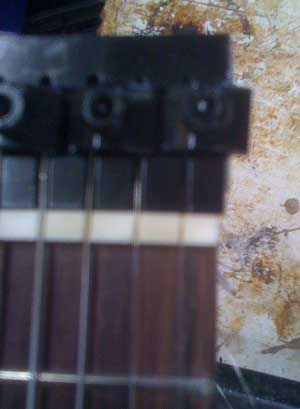
(left) Not super clear but I was hand-holding all this together to
get an idea of where to cut it all.
(right) you can see the original configuration of the headless
locking nut. This needs to be moved and heavily modified. |
 |
 |
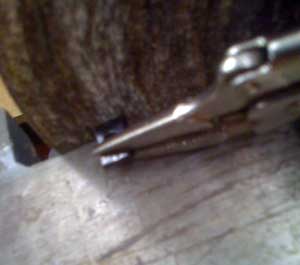
I cut this with a hacksaw using a vise. Then to a disk sander
to clean it up. |
 |
 |
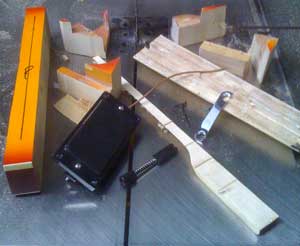
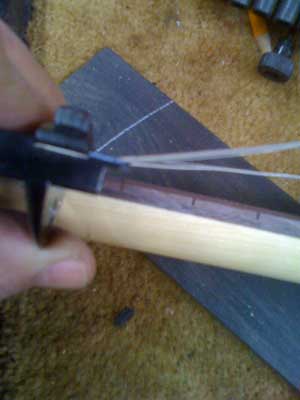
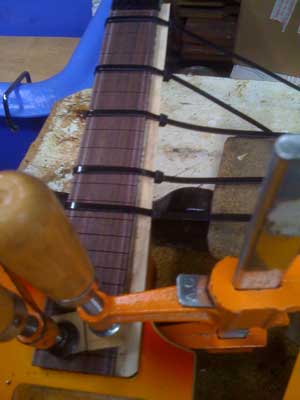
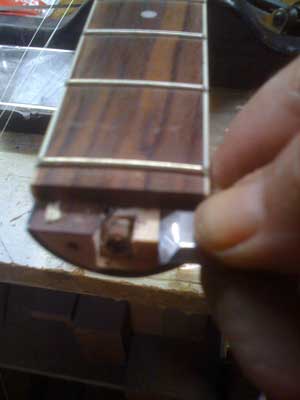
(left) Here is the new 5 string head. and the cut off neck with the
new truss rod in place.
(right) Gluing the new fingerboard on to the modified neck. I love my
new zip tie method. This worked very well. It has always been a
challenge to clamp round surfaces together. Thank you Lord for this
great ides! To bad I can't patent it. There is probably some other poor
luthier that did this somewhere. Seems like when you have a good idea
there is someone somewhere trying to find a similar solution to a
similar problem!!
I think this method would also work for gluing our
Fender vintage veneer type fingerboards
on those old Fender necks! |
 |
 |
Here are the two halves.
(right) We need to cut the neck down and modify it.
|
 |
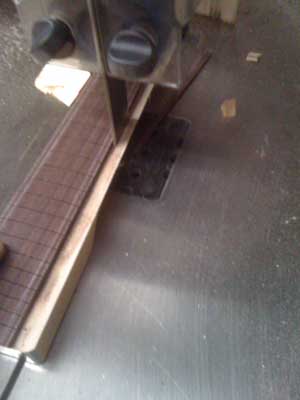 |
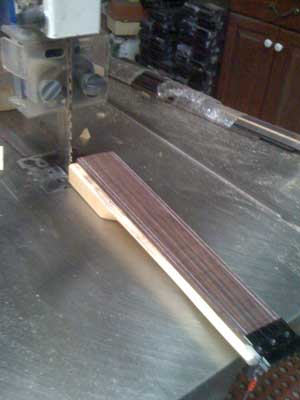
(left) Oh boy! Oh boy! to the bandsaw!! I trimmed to the edge of
the fingerboard. Careful, not too close!!
(right) Recarving the new mandolin profile on a belt sander. I kind
of like a little bigger neck. I also used the neck I like as a rough
dimension. |
 |
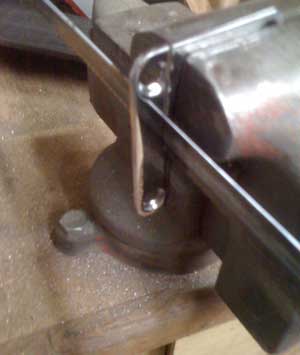 |
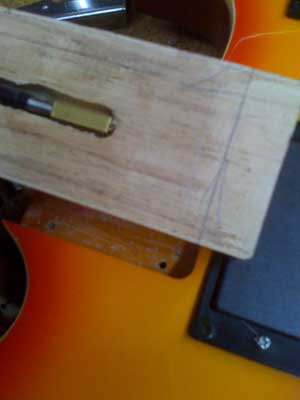
The mounting bracket needed to be cut down and modified. I did this
with a hacksaw and drill press. |
 |
 |
Getting closer! Need to modify the new mandolin neck pocket.
(right) This was a bit of a rough cut! Oh boy! Oh boy! to the
bandsaw!! OK this is getting old now. I promis I won't say it again! |
 |
 |
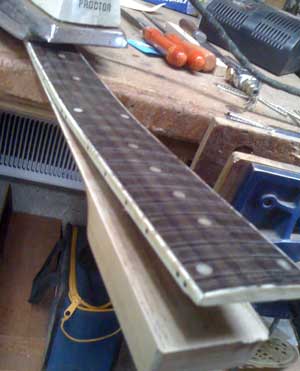
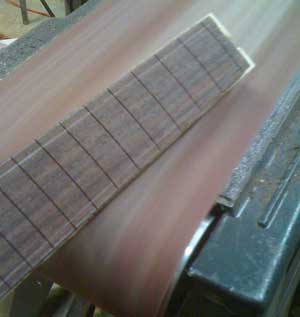
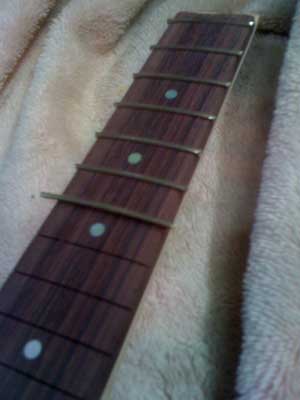
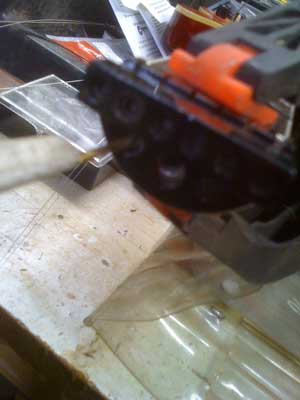
(left) Brad point drills shell dots and
centerlines. (right) Once the inlays are finished it is time for
fretwire. I used our AG-74 guitar sized fret wire.
I prefer it to mandolin size.
I should say here that I originally radiused this fretboard to 7.5"
because that was what my favorite neck was, but our fretwire is
happier working over a 12" radius so I re-radiused this board after the
fact back to 12" using one of our radius
blocks. I don't own one of the fancy fret rollers to change the
radius of the fretwire. And as usual I was in a hurry so my advice is
forget the 7.5" radius and just use 12" I have been playing and it seems
just fine to me. |
 |
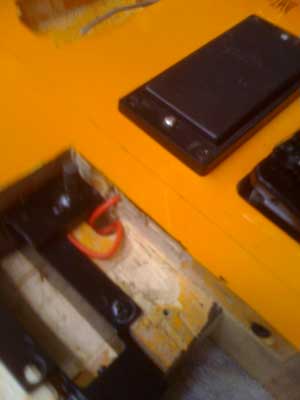 |
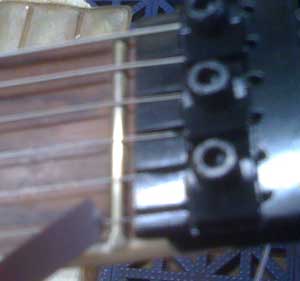
(left) Splice and solder the wires back together. I like to use heat
shrink tubing on splices. Don't forget to put your ground wire back
under the receiver part of the tailpeice. |
|
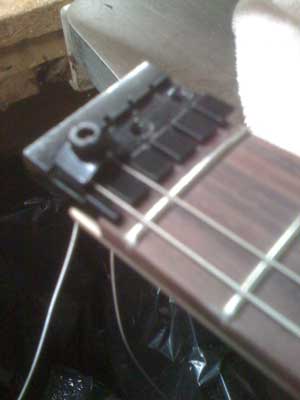 |
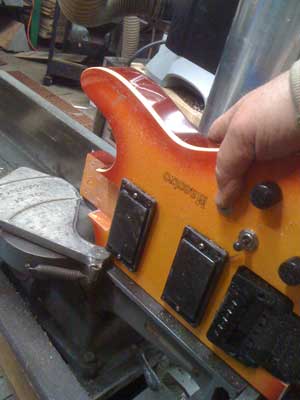
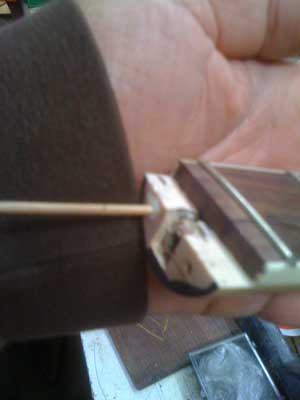
Things that didn't go as planned! I am not completely sold on this
nut idea!
Because it was not located deep enough, it wouldn't hold the string
tight enough to the zero fret. The neck was alredy carved and I didn't
have room for more mods at this point.
The solution was to cut a Fender style nut in by hand. (I much prefer
the bandsaw but....)
I took a fret saw and sliced right in front of the locking nut. Then
I pulled the zero fret back out. "never enough time to do it right
but plenty of time to do it over!!" |
 |
 |
(left) The chisel is one that I modified by re-grinding a 1/4"
down to a 1/8" wide chisel. I has come in very handy over the years and
here it is in service again! So I got so involved making the nut I
didn't think to take any photos! A whole chapter could be given to this.
I will confess that I used a piece of pre-ban scrap scrimshaw ivory for
the nut blank making this instrument totally illegal and subject to
confiscation.
I had bought some of the old scrimshaw cut offs from our old pal the
Duke of Pearl way back. And in talking with Chuck, the way he
understands the new government regulations is that as soon as something
like this touches a tool and is transformed into something else the laws
governing it are the date it came in contact with the tool making it
illegal to own trade, transport or sell.
I actually quit using Ivory for nuts and saddles years ago but now I
don't know what to do with these little scraps I have. Same with the few
scraps of Brazilian rosewood.
I think our government should create an amnesty program where we
could turn it all in, sort of like the hazmat drives. Olly olly oxen
free, free, fee!! (oops, I meant free!)
|
|
 |
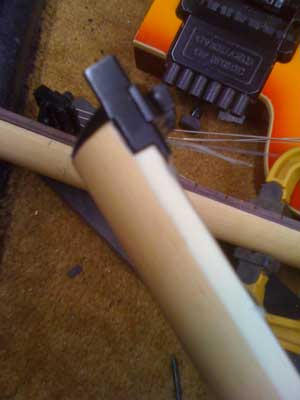
OK back to the other original neck. I didn't notice before but the
original nut was miss fitted. (right) sorry for the fuzzy's but even
with bad photography you can see this isn't right! It is up in the air
about 3/32" Maybe this is the First "Air Locking Headless Nut!!"
It would not put enough down pressure on the zero fret to note
properly. It was about a half a note off. Being a good player but
not a great player I don't need this king of a handicap!
My options were to make another nut like I did for the mandolin neck
or to try to re-mount this hardware.
I chose the second as if it didn't work out I could always revert to
the first. |
 |
 |
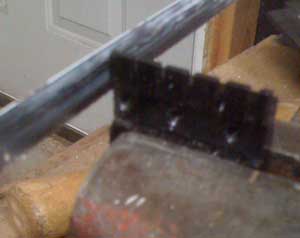
Pretty much just remove the hardware take a sharp chisel and mortise
it down a bit. |
 |
 |
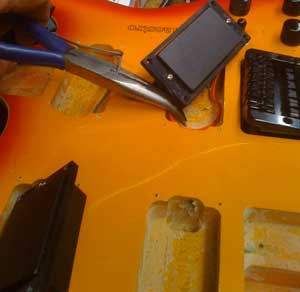
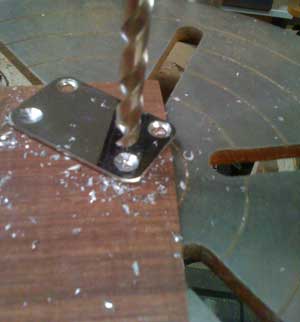
Fill the original screw hole with a toothpick and glue.
(right) Hold the hardware with a clamp and re-drill a new locating
hole. Re-mount. |
 |
 |
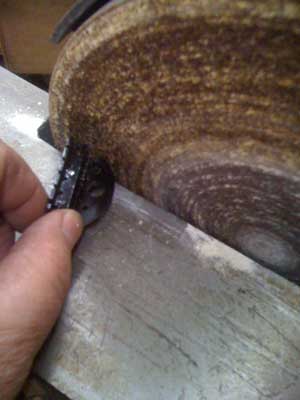
(left) The fretwork on these cheap instruments is sometimes pretty
rough. So I took a little time to take the sharp edges off. |
 |
 |
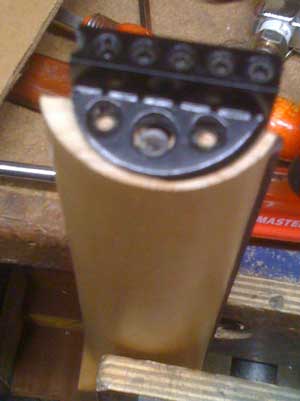
Back to the mandolin nut. Just to finish it out a little better I
took the far right string lock and ground it off so it wasn't sticking
out so far. |
 |
|
|
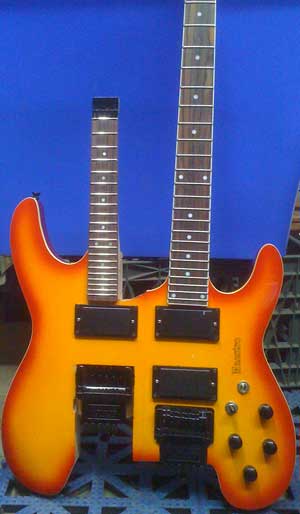
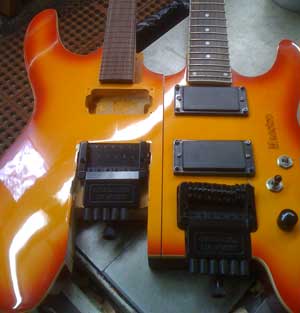
Well here it is for better or for worse! That is pretty much it. One
unexpected consequence was by taking out the lower pickup on the
mandolin side. The pickup selector switch acts like a cut off switch
when it is the far back position. So you can turn the mandolin side off
when moving to guitar. On the down side. It is heavy but it was a fun
project. I don't know that I would do this again. Well, I shouldn't need
to! I do have plans for something similar to an SG style guitar. Cutting
the twelve string neck off and mounting a mandolin neck. Will keep you
posted. By taking the 1" out of the middle it does fit the case now
but barely. If I were to do it over I would have taken 1.5" out. I may
take it back to the bandsaw and take another .5" out. But I must
consider my motives. Do I want it to fit the case better or do I just
want to have the experience of cutting the guitar in half again??? I
can't be sure!
The photo to the right is before the bandsaw escapade and you can see
it just won't fit.
I may put a little kit together here for those who would like to do
the same. Look for the button on this page as I won't list it elsewhere
on the site. Also not to be a snob or anything but I won't have time to
talk about this or give any advice regarding this. The sum of my vast
knowledge is all right here! I would be making stuff up to talk any
further about this!!
|
 |
| |
Now as Paul Harvey says "For the rest of the story." |
|
| |
The Good, The Bad & The Ugly!! |
|
| The Good!! From this side it looks just fine! This is the side I
will choose to remember!! |
 |
|
| |
And Now for the rest of the story. This was an experiment and a bit
of a prototype. It can always be improved but there are some pitfalls.
These details don't really bother me, from my viewpoint the instrument
it looks just fine! But I thought I should be fair and show some
of the less attractive sides of this modification. (mod) |
|
 |
This is the underside of the new neck and pocket and you
can see where I cut through the original mounting screws. These really
mess with the sound when you play a minor chord! NOT!!! Sorry for my dry
sense of humor but you get my meaning. It isn't pretty but it works! And
it could be improved on! |
|
| |
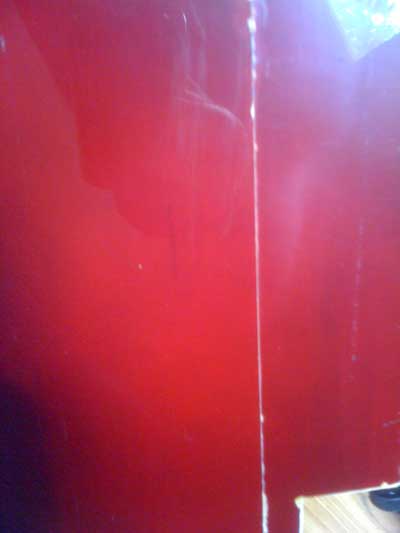
The paint is actually a nice thin finish, but it chips
very easily! If chipped paint bothers you, you should plan on
refinishing the entire body when you are finished with the mod. I will
consider mine a Relic by Randy!! No extra charge! Well There you have
it. The Good, The Bad & The Ugly!! |
 |
 |
|
|
| |
|
|