Installation of Allen TR-1
This applies to Godin, Tacoma and
other flat top mandolins. |
| I read recently a few items about someone not being
able to install one of our tailpieces on a Tacoma mandolin. And this
Godin is a very similar situation. I wanted to try out one of the
Godin A-8 models so I ordered one. It was a B stock instrument and
when it showed up I was surprised to find the tailpiece cover packed
in the case instead of on the instrument.
I would like to think they sent it this way because they were
concerned about it coming off in shipping, and that may be as second
reason. The first reason I am sure is because the cover wouldn't stay
on long enough to even get it in the case. The loose cover was
actually all I found to be wrong with this instrument which was great
for me as I was going to throw the tailpiece in the garbage anyway!!
The TR-1 is a good choice for this although I believe the AR-2 and
the TR-3 would work as well. The TR-2 would be more difficult (not
impossible but difficult) to deal with in this situation so I would
put it on the bottom of the list in choices. |
 |
 |
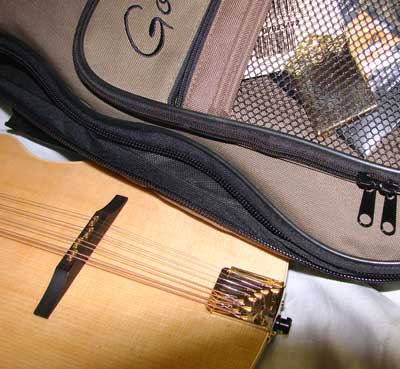
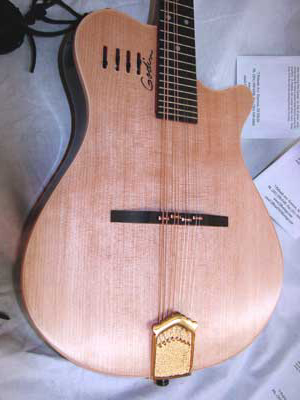
Here you can see the original tailpiece. It is
interesting to note that the tailpiece is resting and making contact
with the top of the instrument. The strings resting on the leading
edge are actually applying downward pressure on the top and this is a
flat top instrument! There is absolutely no way that our cast
tailpiece would put more pressure on the top than this stamped
tailpiece as a few self appointed "experts" have implied. See other
photos on this page and you will see that our cast tailpieces actually
do not contact the top of the instrument and the string angle is very
similar to the stamped model. What does happen is that our tailpieces
being solid and much more rigid than a flimsy piece of tin will
transfer the vibration of the string to the instrument with more
efficiency. This tailpiece sounded horrible and the instrument
had an abundance of buzzing and rattles even without the cover being
installed. |
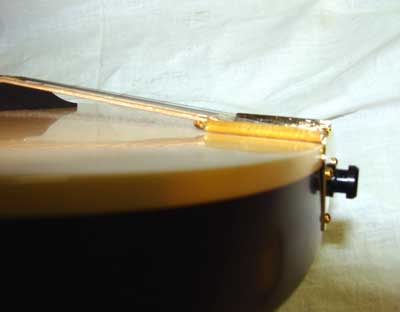
| As you can see in this photo, our TR-1 sits
quite a bit higher than the stamped model. These are set up for
installation on the usual carved arched top instrument. We need to
adjust the cast tailpiece to better fit the closer to 90 degree angle
of this instrument. This is probably more easily accomplished with an
unplated polished bronze model, but we are going to use a plated one
here. *note. The tailpiece will probably wind up with a few
light scratches from this process. |
 |
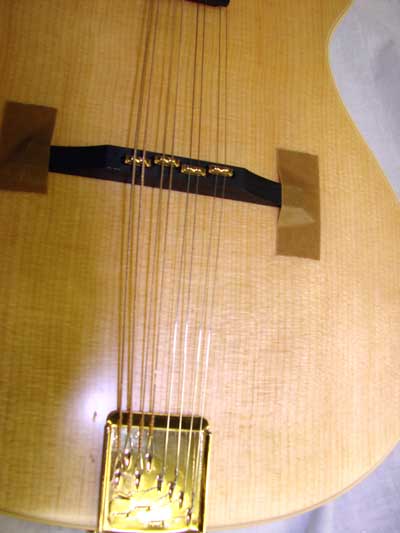 |
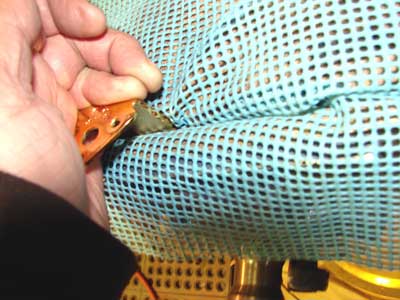
The first thing we want to do is to tape the bridge in
place so that it doesn't move around. This one being an electric will
have a wire down through the top so it probably wouldn't drift too
far. But the tape will keep it located so you won't have to struggle
too much to get the intonation where you want it. Then of course
remove the strings along with the stamped tailpiece and strap button. |
| The next thing we'll do is to tweak the tailpiece to
better fit the instrument. I usually like to recommend that if you
need to adjust the tailpiece to adjust it over the body instead of the
end of the piece. Since we have so far to go we will need to do both.
Start by placing the tailpiece in a vice. Use some type of protection
for the finish. The material we are using should be available at your
hardware store or even at a grocery store. Apply enough force to
bend the part slightly. Take it out of the vice often and check its
fit on the instrument. You do not want it to fit like the old one so
don't worry about trying to get it to touch the top. We don't want it
to touch the top!
|
 |
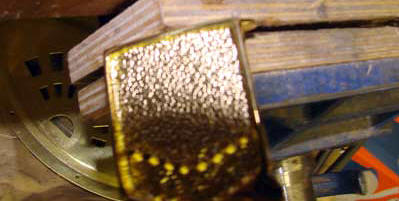 |
The safest way to adjust the back of the
tail is using a woodworkers vice with wooden faceplates. It is a
little hard to see in the photo but the tailpiece is centered on the
corner of the vice so that the corner of the vice engages as far as
possible to the underneath side of the face. "I dare you to say that
three times fast!"
Use protective material for this, the top photo was used to show
the location of the tailpiece to the vice.
Apply slight pressure to the body and check the fit often. It is
better to Adjust often that to over bend and have to bend it back. |
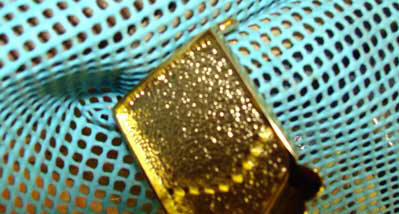 |
| Apply the felt to the underneath side of the leading
edge of the tailpiece. Usually the strip is supplied as one length. It
will need to be cut and mitered to fit the front of the tailpiece. |
 |
 |
Restring the mandolin, tune it up and you are done!! |
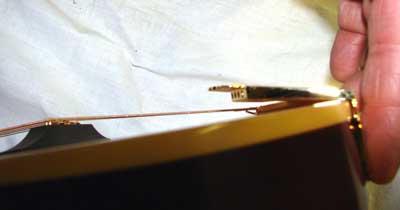
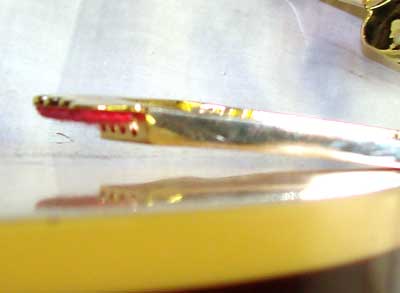
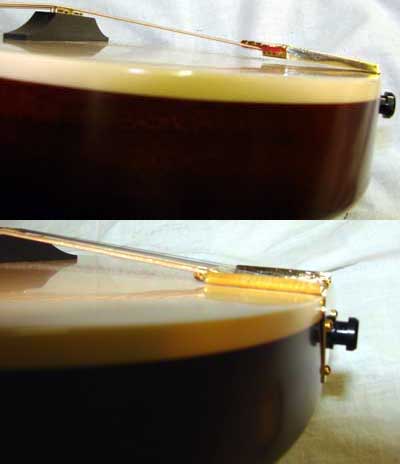
| To the right you can see the difference between the
two tailpieces. Notice that the Allen tailpiece does not come in
contact with the top of the mandolin. Also note that the string angle
is not tremendously different. The pressure to the top is very similar
to its' original state. If anything, in this case there is actually
less pressure to the top because the tailpiece is not contacting the
top. The top is free to move independently of the tailpiece and is
not dampened by the stamped tailpiece that was applying down pressure
on the top.
To purchase Allen tailpieces or our new DVD
"Installing Allen Tailpieces" click here.
Download a
PDF file of this installation procedure. |
 |